Sage Integration Guide

This guide will cover how to integrate your Cue workspace with Sage 300 People.
Overview
- Requirements for Integration
- Create a Cue Flow to connect to Sage
- Get a Sage access token
- User verification
- Check Leave Days
- Get Payslips
- Get Tax Certificates
Requirements for Integration
To set up this integration, you will need:
- An active Sage account, including the API endpoint (URL) and
apiKey. In this guide, we’ll refer to the API endpoint asBASE_URL. - Administrator-level access in Sage to configure API endpoints.
- Access to Flows in your Cue workspace (typically granted with an Admin role).
Create a Cue Flow to connect to Sage
Once you have the endpoint (BASE_URL) and apiKey, you now need to set up a flow in Cue that will connect to Sage.
Get a Sage access token
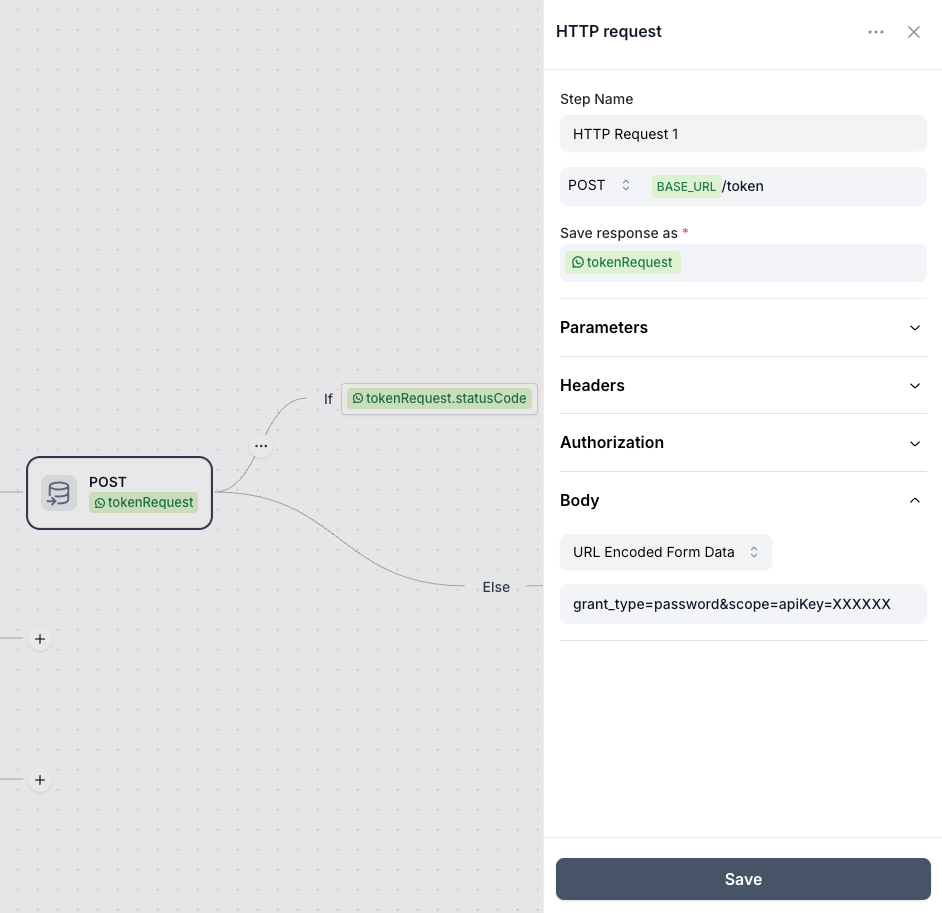
Any API request you make to a Sage API endpoint (e.g. to check leave days) will require an access token. In order to get this access token you will need to make a request to their token API.
The URL for this request is:BASE_URL/token
In your Cue flow, you can do this by creating an HTTP Request step that looks something like the example below. Be sure to insert your grant_type and apiKey.
If your request is successful you can extract the access token from the response to your request:
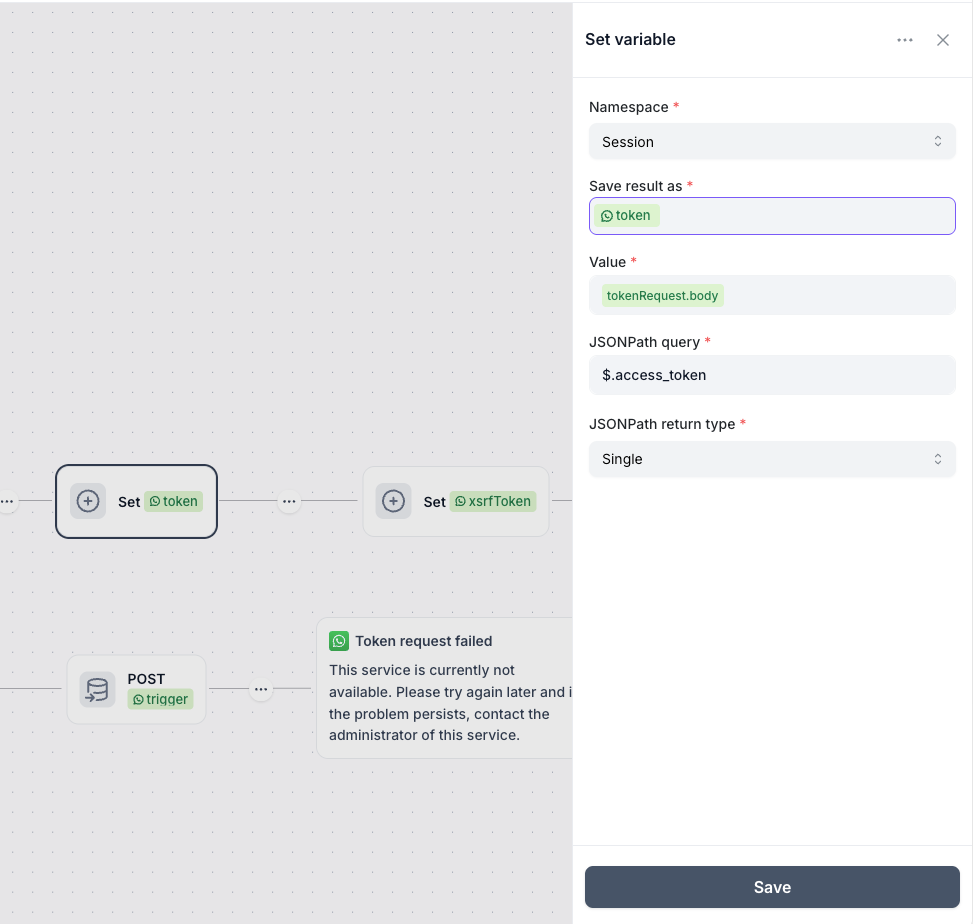
You can now use this token in your API requests to get leave balances, get payslips and tax certificates. Also note that on your token request API call you also get headers that you should store as variables like we did with the token, these are x-xsrf-token and set-cookie that will be used as cookie headers on all our API calls
Check screenshot below:

User verification
Before making any requests, it's essential to verify the user. To do this, we first ask the user for their employee_code. Using this employee_code, we make an API call to BASE_URL/api/apibase/GenericGet/EMP_DETAIL, which returns the user's full employee details.
From the response, extract and store the following key fields for use in subsequent API calls: id/passport, employeeID, companyCode, companyRuleCode, and phoneNumber.
For verification, also ask the user to provide their ID and compare it with the ID returned by the API. Additionally, ensure that the cellphone number provided by the API matches the WhatsApp number the user is contacting from - this is referred to as contactIdentifier in our system.
Refer to our sample flow for full implementation details.
Check Leave Days
Users can request to get their leave balances, to do that we use the following endpoint BASE_URL/api/apibase/GenericGet/EMP_LEAVE
Employee code will be required to make this call, check example below:
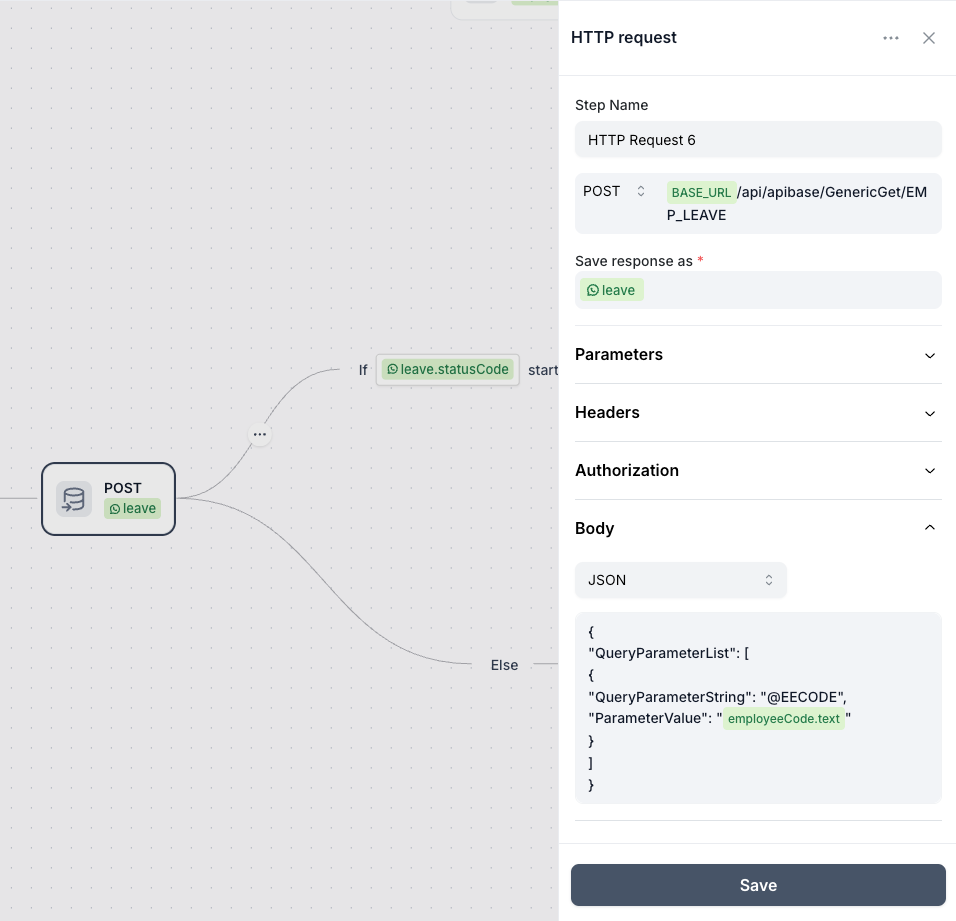
The request above returns all leave lines and balances. It's important to select only the relevant leave types you want to share with users - for example, Annual Leave or Sick Leave balances.
In some cases, such as with Annual Leave, there may be multiple leave lines that need to be combined to calculate the total balance. You can use functions to handle this aggregation.
See our example below for guidance.
module.exports = function main(input) {
var leaveBalances = {
'annual': 0.00,
'sick': 0.00,
'fam': 0.00,
}
input.data.forEach((leave) => {
switch (leave.leaveType) {
case 'AP_ANN_22_25':
leaveBalances.annual = leaveBalances.annual + leave.balanceIncludingPlanned;
break;
case 'AP_SAL_SICK':
leaveBalances.sick = leaveBalances.sick + leave.balanceIncludingPlanned;
break;
case 'AP_SAL_FAMILY':
leaveBalances.fam = leaveBalances.fam + leave.balanceIncludingPlanned;
break;
default:
break;
}
})
const text = `Annual: ${parseFloat(leaveBalances.annual).toFixed(2)}
Sick: ${parseFloat(leaveBalances.sick).toFixed(2)}
Family Responsibility: ${parseFloat(leaveBalances.fam).toFixed(2)}`
return text;
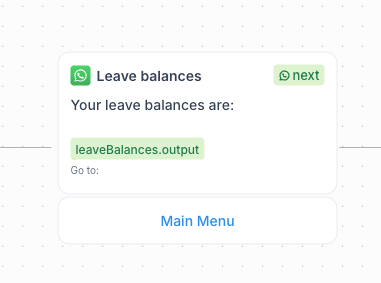
}You can then present the output from the function above on your message step where you display leave balances.
Get Payslips
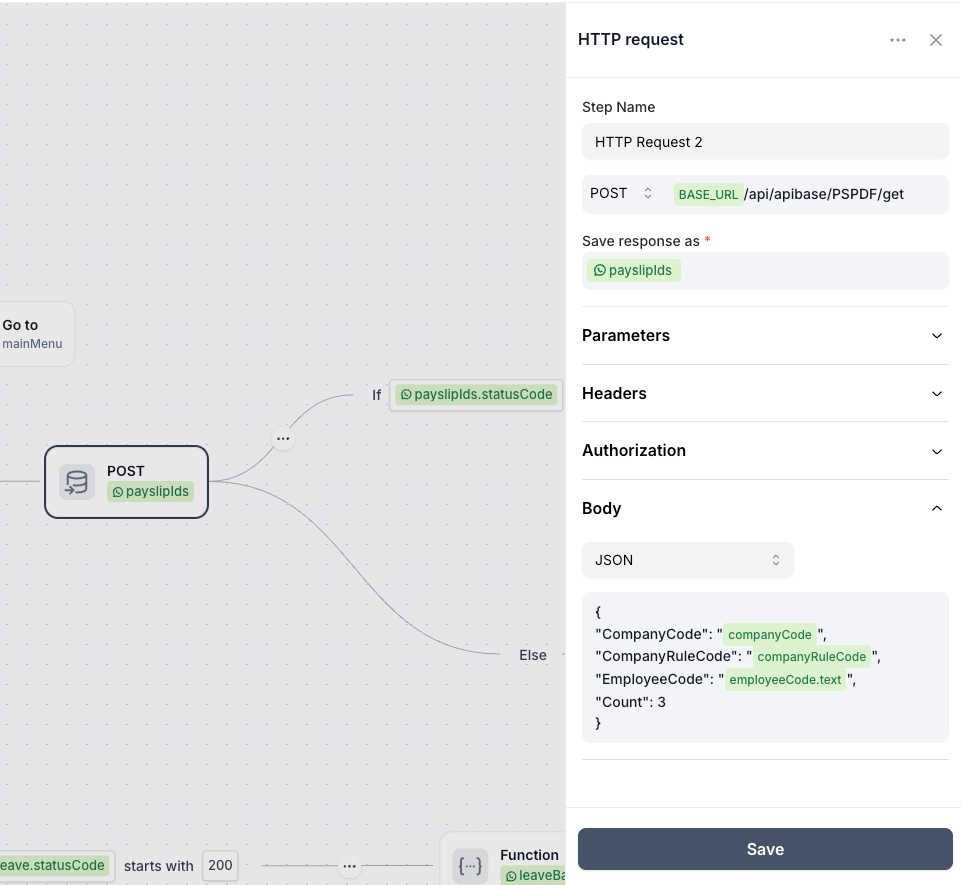
Next, we'll look at how users can retrieve their payslips. The first step is to obtain the payslip IDs, which are needed to generate the actual payslips using the endpoint:BASE_URL/api/apibase/PSPDF/get
This request requires the following parameters: CompanyCode, CompanyRuleCode, EmployeeCode, and Count.
The first three values are retrieved from the initial employee details API call:BASE_URL/api/apibase/GenericGet/EMP_DETAIL
The Count parameter specifies how many recent payslips to return - typically, Sage returns the most recent payslips.
See the example API call below for reference.
Using the response from the above API call, we can use a FUNCTION step to retrieve all payslip IDs. Additionally, you can create a function to filter and return only specific payrun types - for example, you might choose to store only the Main Payrun payslip types.
module.exports = function main(input) {
const data = input.data;
let psIds = [];
data.forEach((ps) => {
switch (ps.payrun) {
case 'Main Payrun':
psIds.push(ps.payslipID)
}
});
return {
'psIds': psIds,
'psCount': psIds.length
};
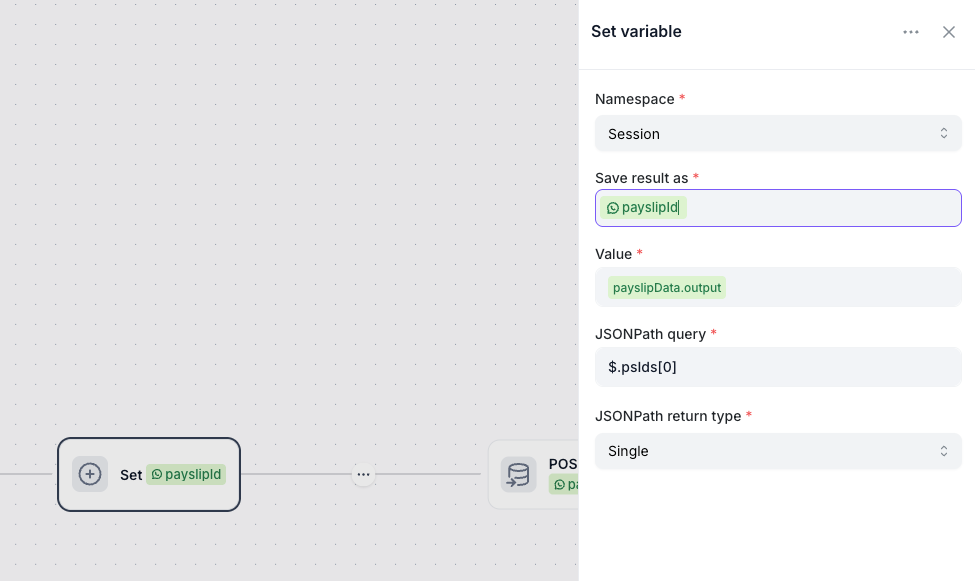
}After completing the above steps, you can use the function output to assign the payslipIdvalues. See the example below for reference.
Lastly we will have to make an API call to the following endpoint to get payslip PDF based on the payslipID and EmployeeCode

Get Tax Certificates
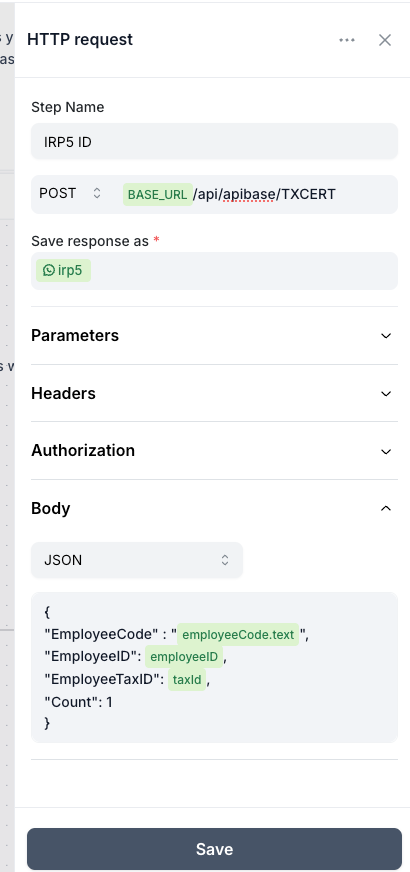
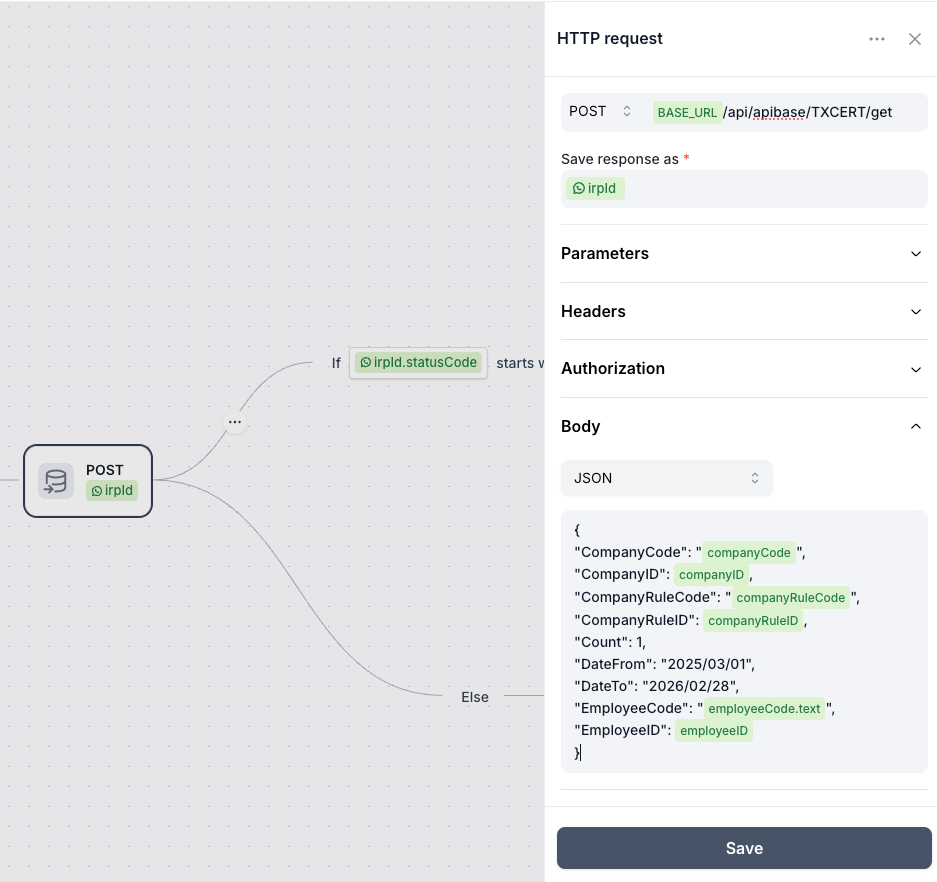
To retrieve payslips, use the following endpoint:BASE_URL/api/apibase/TXCERT/get
The required parameters are: CompanyCode, CompanyID, CompanyRuleCode, CompanyRuleID, DateFrom, DateTo, EmployeeCode, and EmployeeID.
All of these values, except for DateFrom and DateTo, can be obtained from the employee details response (BASE_URL/api/apibase/GenericGet/EMP_DETAIL).
Refer to the example below for implementation details:
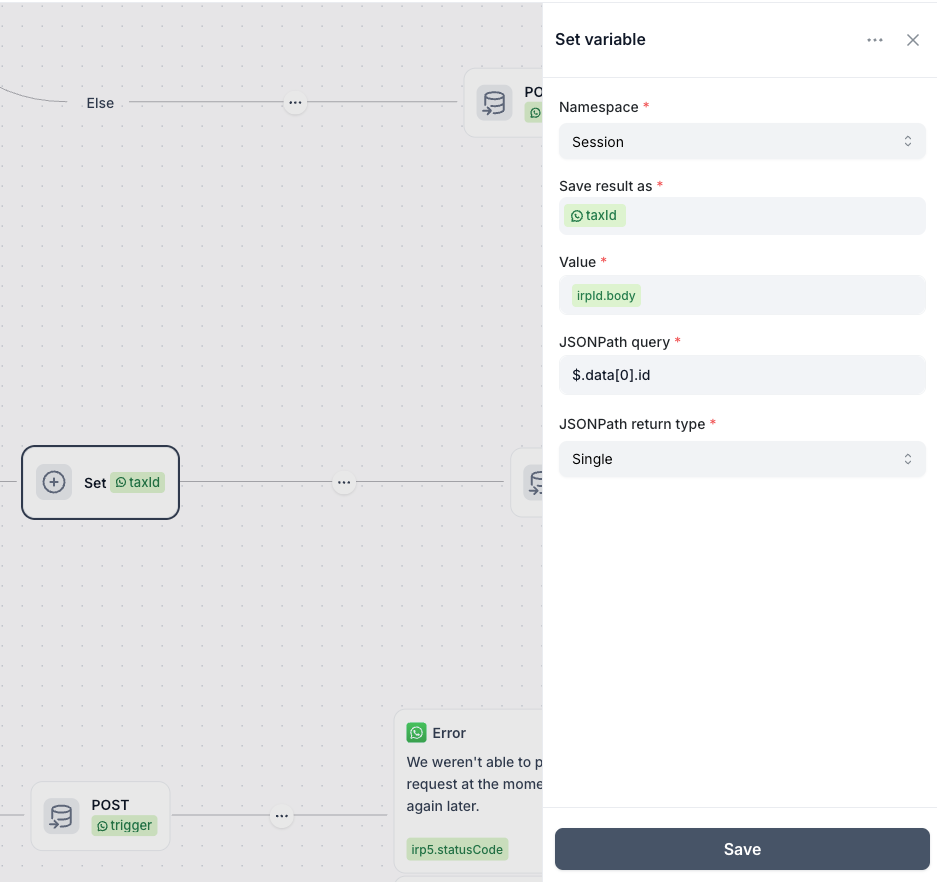
Using the response from the above API call we can use our set step to get the taxId which will be data[0].id
Finally, we make an API call to the endpoint BASE_URL/api/apibase/TXCERT, which returns the URL for the payslip PDF.