How to add users to your Cue workspace
Adding users to Cue is a simple process that allows you to grant specific roles and permissions to individuals within your team.
Step-by-step interactive guide:
Follow this link for a step-by-step interactive guide on how to use our system.
Follow these steps to add users effectively:
- Open app.cuedesk.com
- Navigate to Settings > Users
- Click 'Create user'
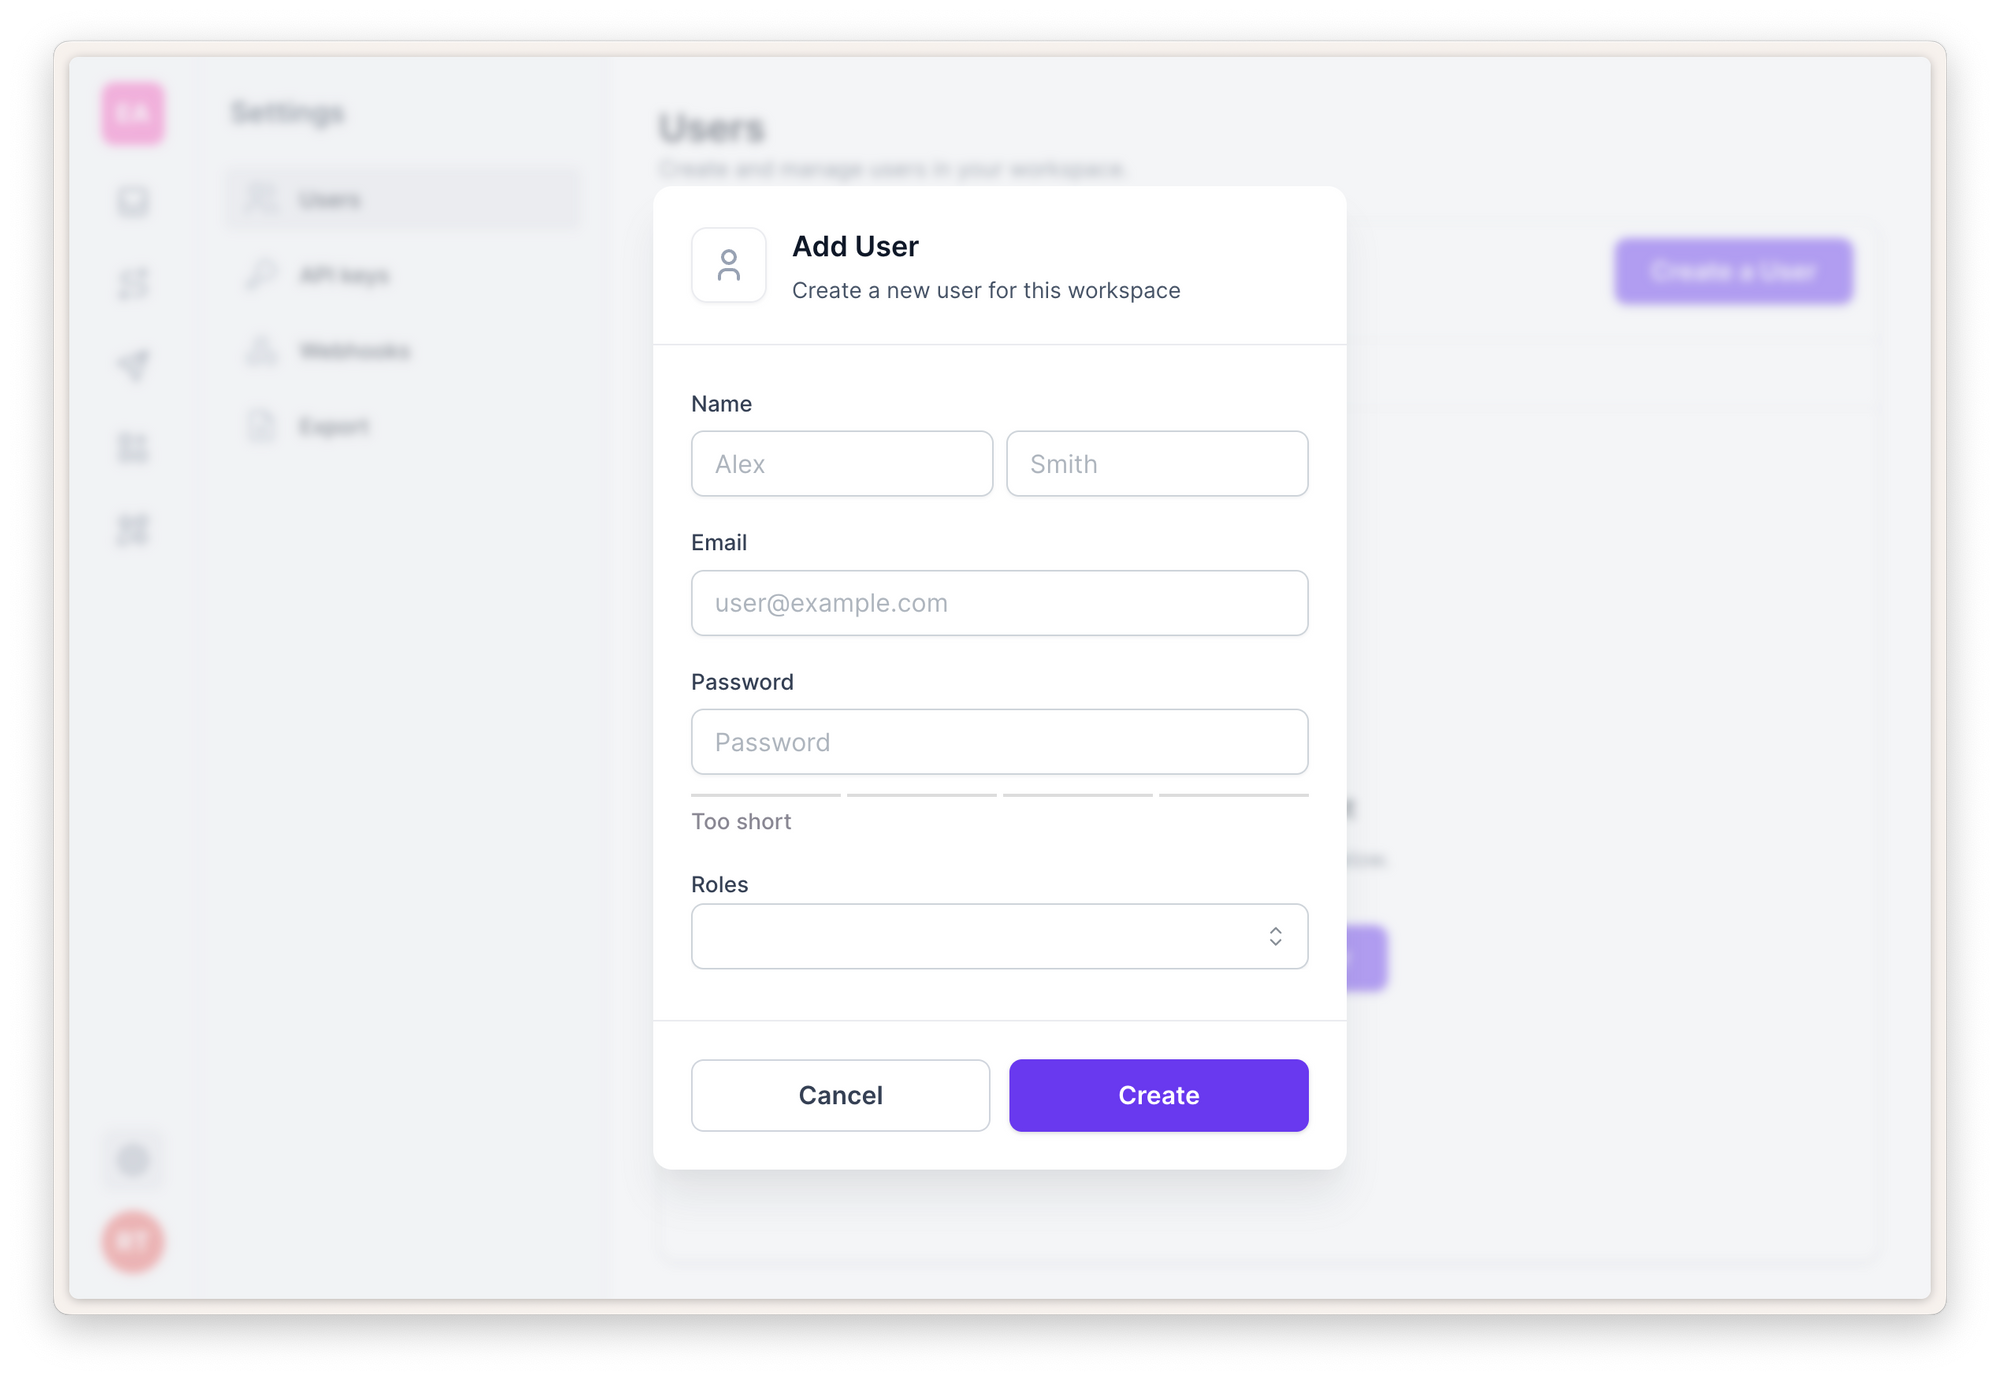
Fill out the necessary information for the new user:
- Name and Surname
- Email - this will be their username
- Password - set a password for the user.
Assigning roles
You can then assign appropriate roles to the user based on their responsibilities within Cue. Here are the available roles and their corresponding permissions:
- Agent: Can access inbox and both assigned and unassigned tickets.
- Outbound Agent: Same as Agent but can also start new one-on-one chat conversations with customers.
- Supervisor: Has full inbox access and can manage users.
- Broadcast Manager: Can manage broadcasts and templates.
- Flow Manager: Can manage chatbot flows. This role will soon be merged into Workspace Owner.
- Workspace Owner: Admin role that has all access to the workspace. Will soon be renamed to admin role.
Save your user
Once you've filled out the required details and selected the appropriate role, ensure to save the changes. This involves clicking on the"Create" button.
By following these steps, you'll be able to efficiently add users to Cue and ensure that they have the necessary access and permissions to carry out their tasks effectively.
Removing a user
To delete a user, go to Settings, find the user you'd like to remove, then scroll to the right. Click the three dots menu and select Delete.